Supabase
Setup you Flutter Fast project with Supabase.
Setup
Before Generating Your App
Create a Supabase account and project: https://supabase.com/
After Generating Your App
After creating your Supabase project, add the following variables to your config.json file:
"SUPABASE_URL": "","SUPABASE_ANON_KEY": ""The SUPABASE_URL value can be found in the dashboard here:
All Projects -> Your Project -> Project Settings -> API -> Project URL
The SUPABASE_ANON_KEY value can be found on the same page:
All Projects -> Your Project -> Project Settings -> API -> Project API keys (anon public)
The Flutter setup steps will be completed by the Flutter Fast CLI.
Google Sign In
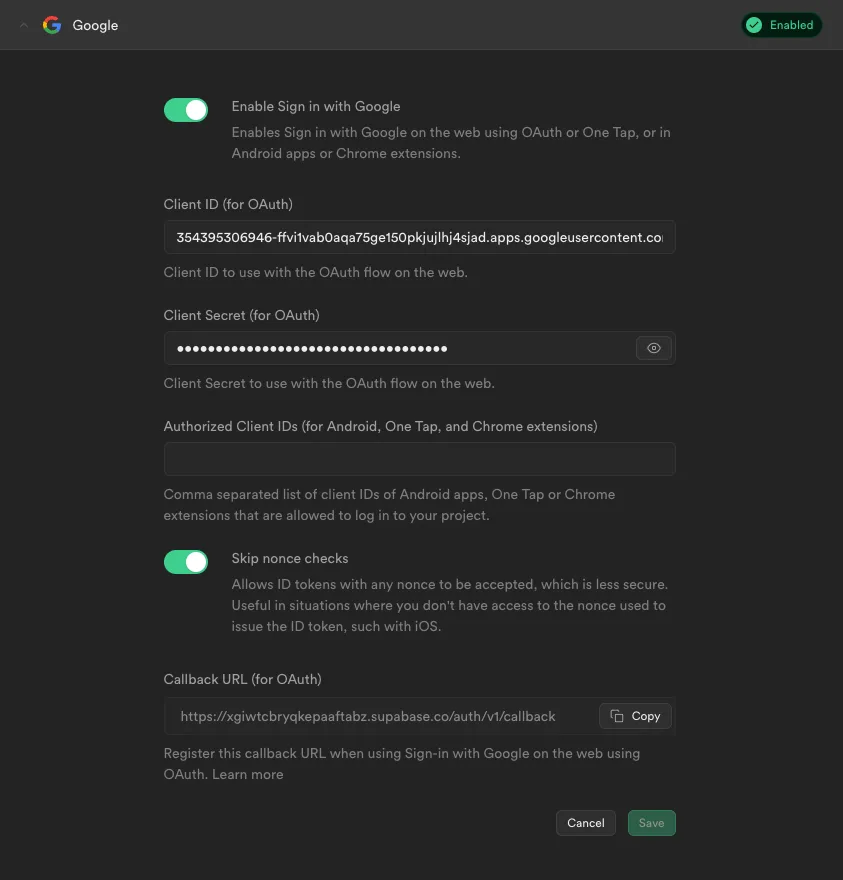
Navigate to the Authentication tab in your Supabase console, select the “Providers” section, and enable Google Sign In.
Next add the google_sign_in package to your pubspec.yaml.
Create a SHA1 fingerprint. To do this, you’ll first need to create your release key:
keytool -genkey -v -keystore ~/Dev/keys/flutterfast.jks -keyalg RSA -keysize 2048 -validity 10000 -alias uploadThen you can list the details of that key to find the SHA1:
keytool -list -v -alias upload -keystore ~/Dev/keys/flutterfast.jksThe SHA1 and SHA256 will be listed under “Certificate fingerprints”. Jot these down for later.
You will also need your debug SHA1 which you can find using this command (password is “android”):
keytool -list -v -alias androiddebugkey -keystore ~/.android/debug.keystoreCreate a new credential in your Google Cloud console.
- Click “Create credentials”
- Select “OAuth client ID”
- Select your application type (Android)
- Enter your credential name, package name, and SHA1 from above
- Click “Create”
Once the credential is created, locate it on the credentials tab and copy the client ID. Add this to the config.json file under the GOOGLE_ANDROID_CLIENT_ID key.
Create a new credential in your Google Cloud console.
- Click “Create credentials”
- Select “OAuth client ID”
- Select your application type (iOS)
- Enter your credential name, package name, and SHA1 from above
- Click “Create”
Once the credential is created, locate it on the credentials tab and copy the client ID. Add this to the config.json file under the GOOGLE_IOS_CLIENT_ID key.
Create a new credential in your Google Cloud console.
- Click “Create credentials”
- Select “OAuth client ID”
- Select your application type (iOS)
- Enter your credential name, package name, and SHA1 from above
- Click “Create”
Once the credential is created, locate it on the credentials tab and copy the client ID. Add this to:
- The
config.jsonfile under theGOOGLE_WEB_CLIENT_IDkey index.htmlin the meta tag named “google-signin-client_id”
You will also need to add this value in your Supabase console under “Authorized Client IDs” in the Google Sign In section.
Lastly, enable the People API in th GCP console.
Apple Sign In
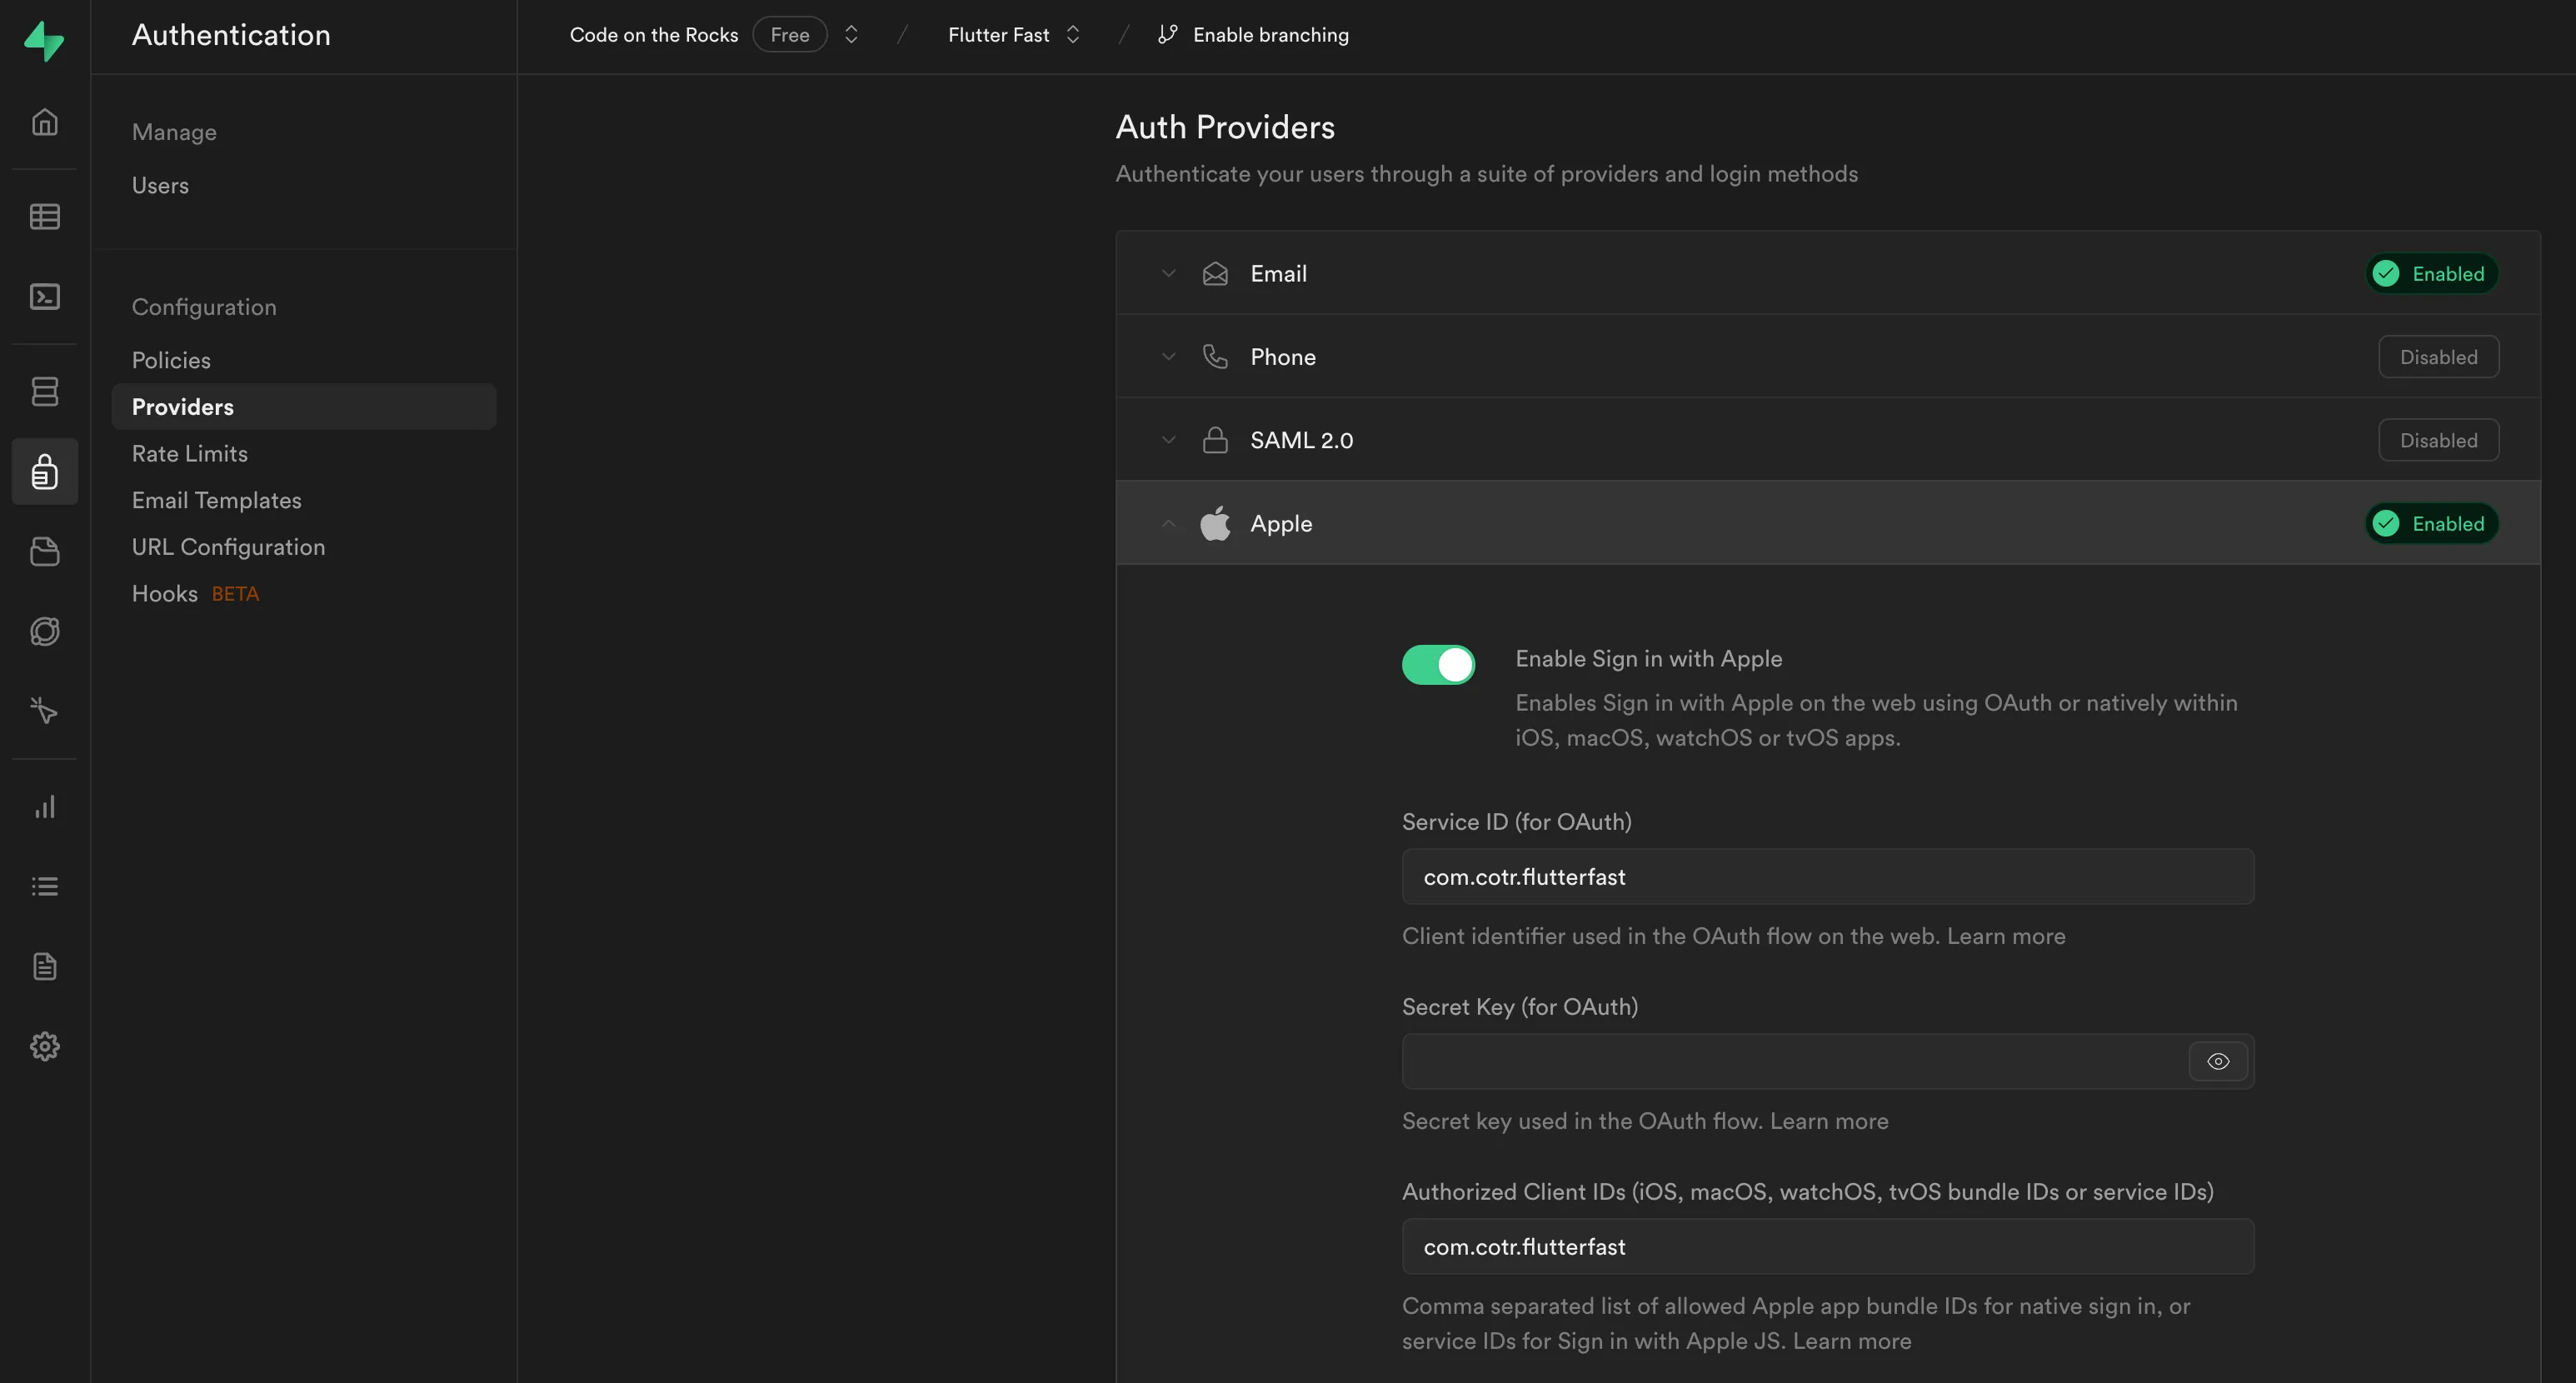
Navigate to the Authentication tab in your Supabase console, select the “Providers” section, and enable Apple Sign In.
Add the sign_in_with_apple package to your pubspec.yaml.
To start, navigate to the identifiers page in your Apple developer console. Select the ”+” button and create a new “Services ID”.
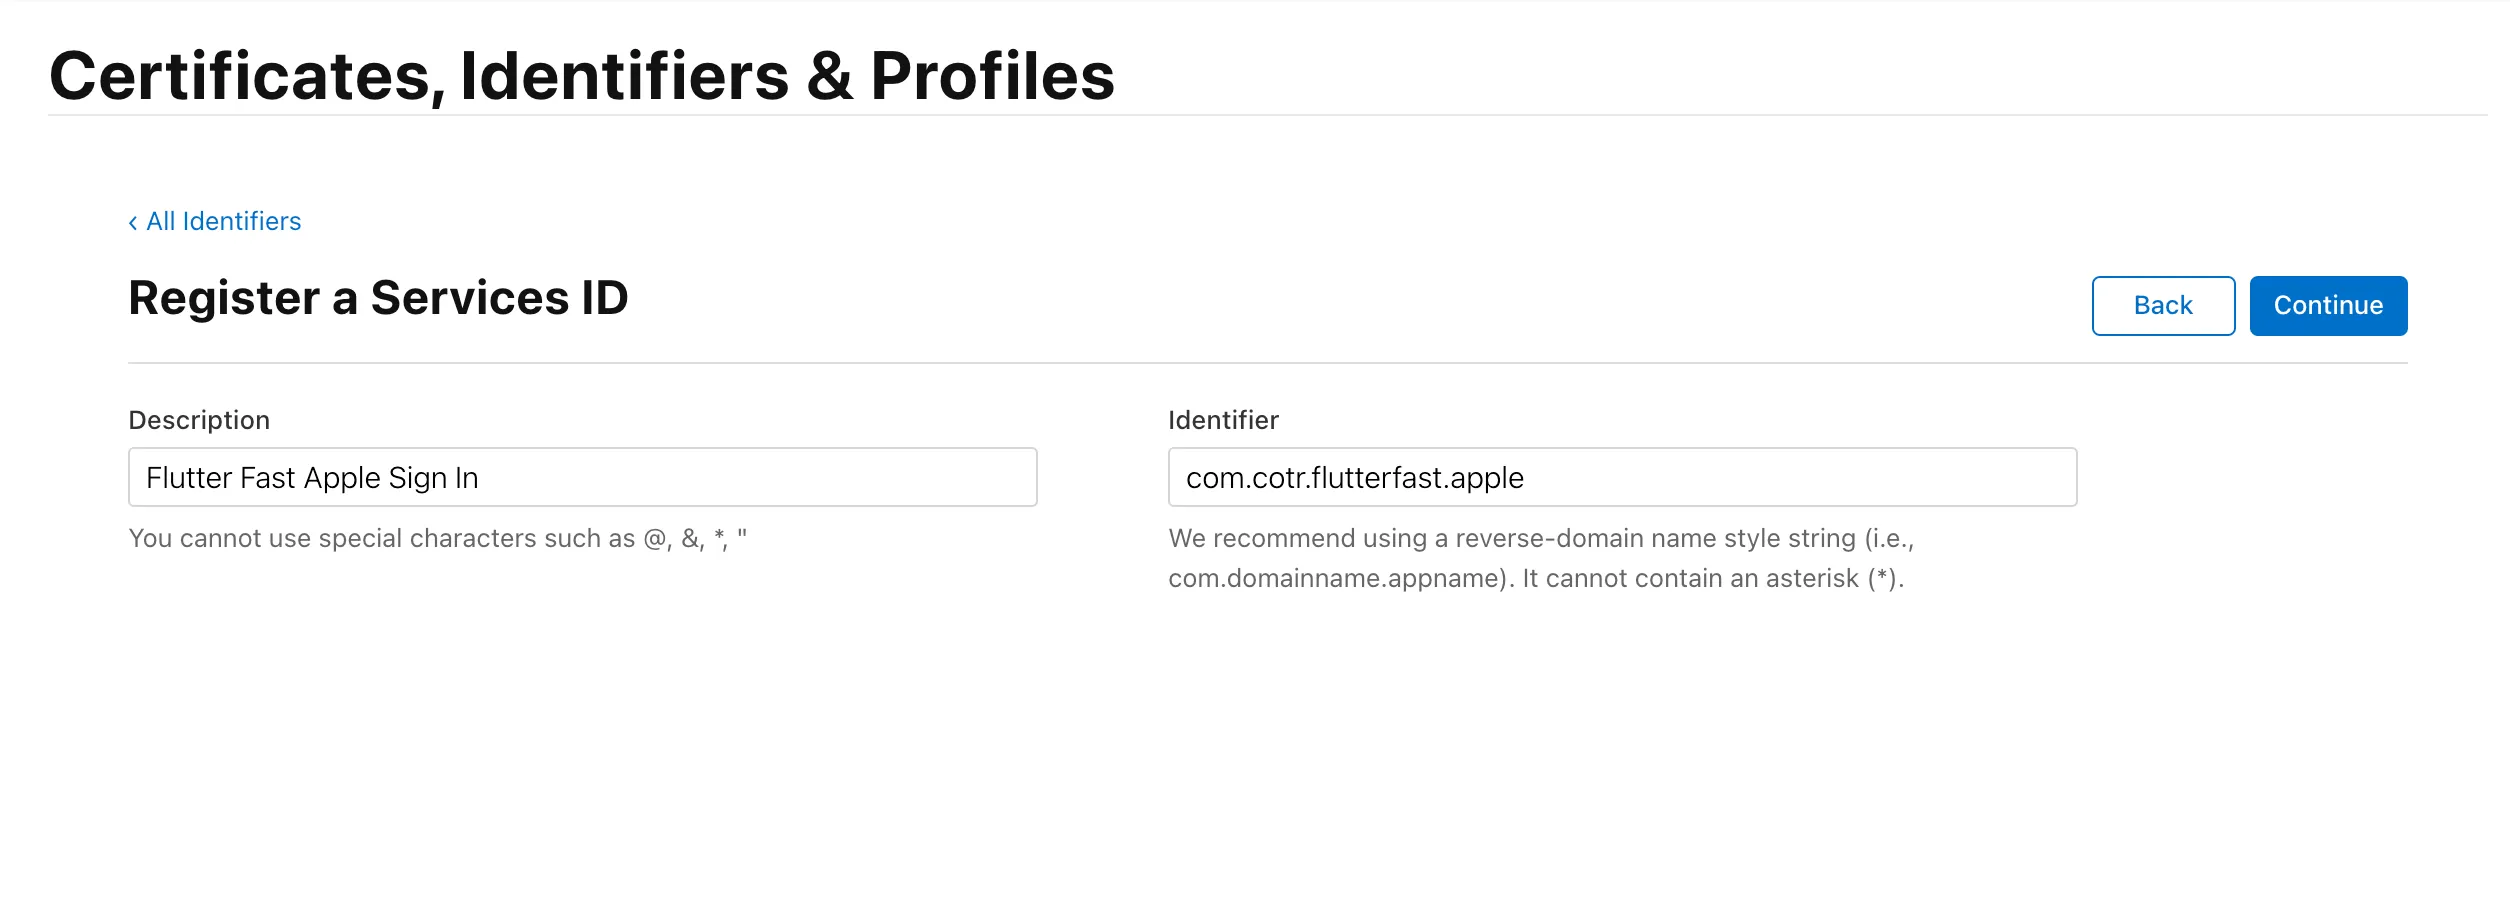
Copy the identifier (ex. com.cotr.flutterfast.apple) for later.
Next, create a Sign in with Apple Service from the Apple developer console. When it asks for domains, use the domain of your Supabase project (ex. xgiwtcbryqkepaaftabz.supabase.co).
Create a signing key by navigating to the “Keys” section in your Apple Developer account and clicking the ”+” button. Fill out the form and download the .p8 file.
Use this tool from the Supabase docs to generate your secret key using the following items:
- The
.p8file - Your developer account ID (Upper right of the developer console, under name)
- Your service ID (ex.
com.cotr.flutterfast.apple)
Copy the generated secret key into the “Secret Key (for OAuth)” field on the Apple provider tab in your Supabase console.
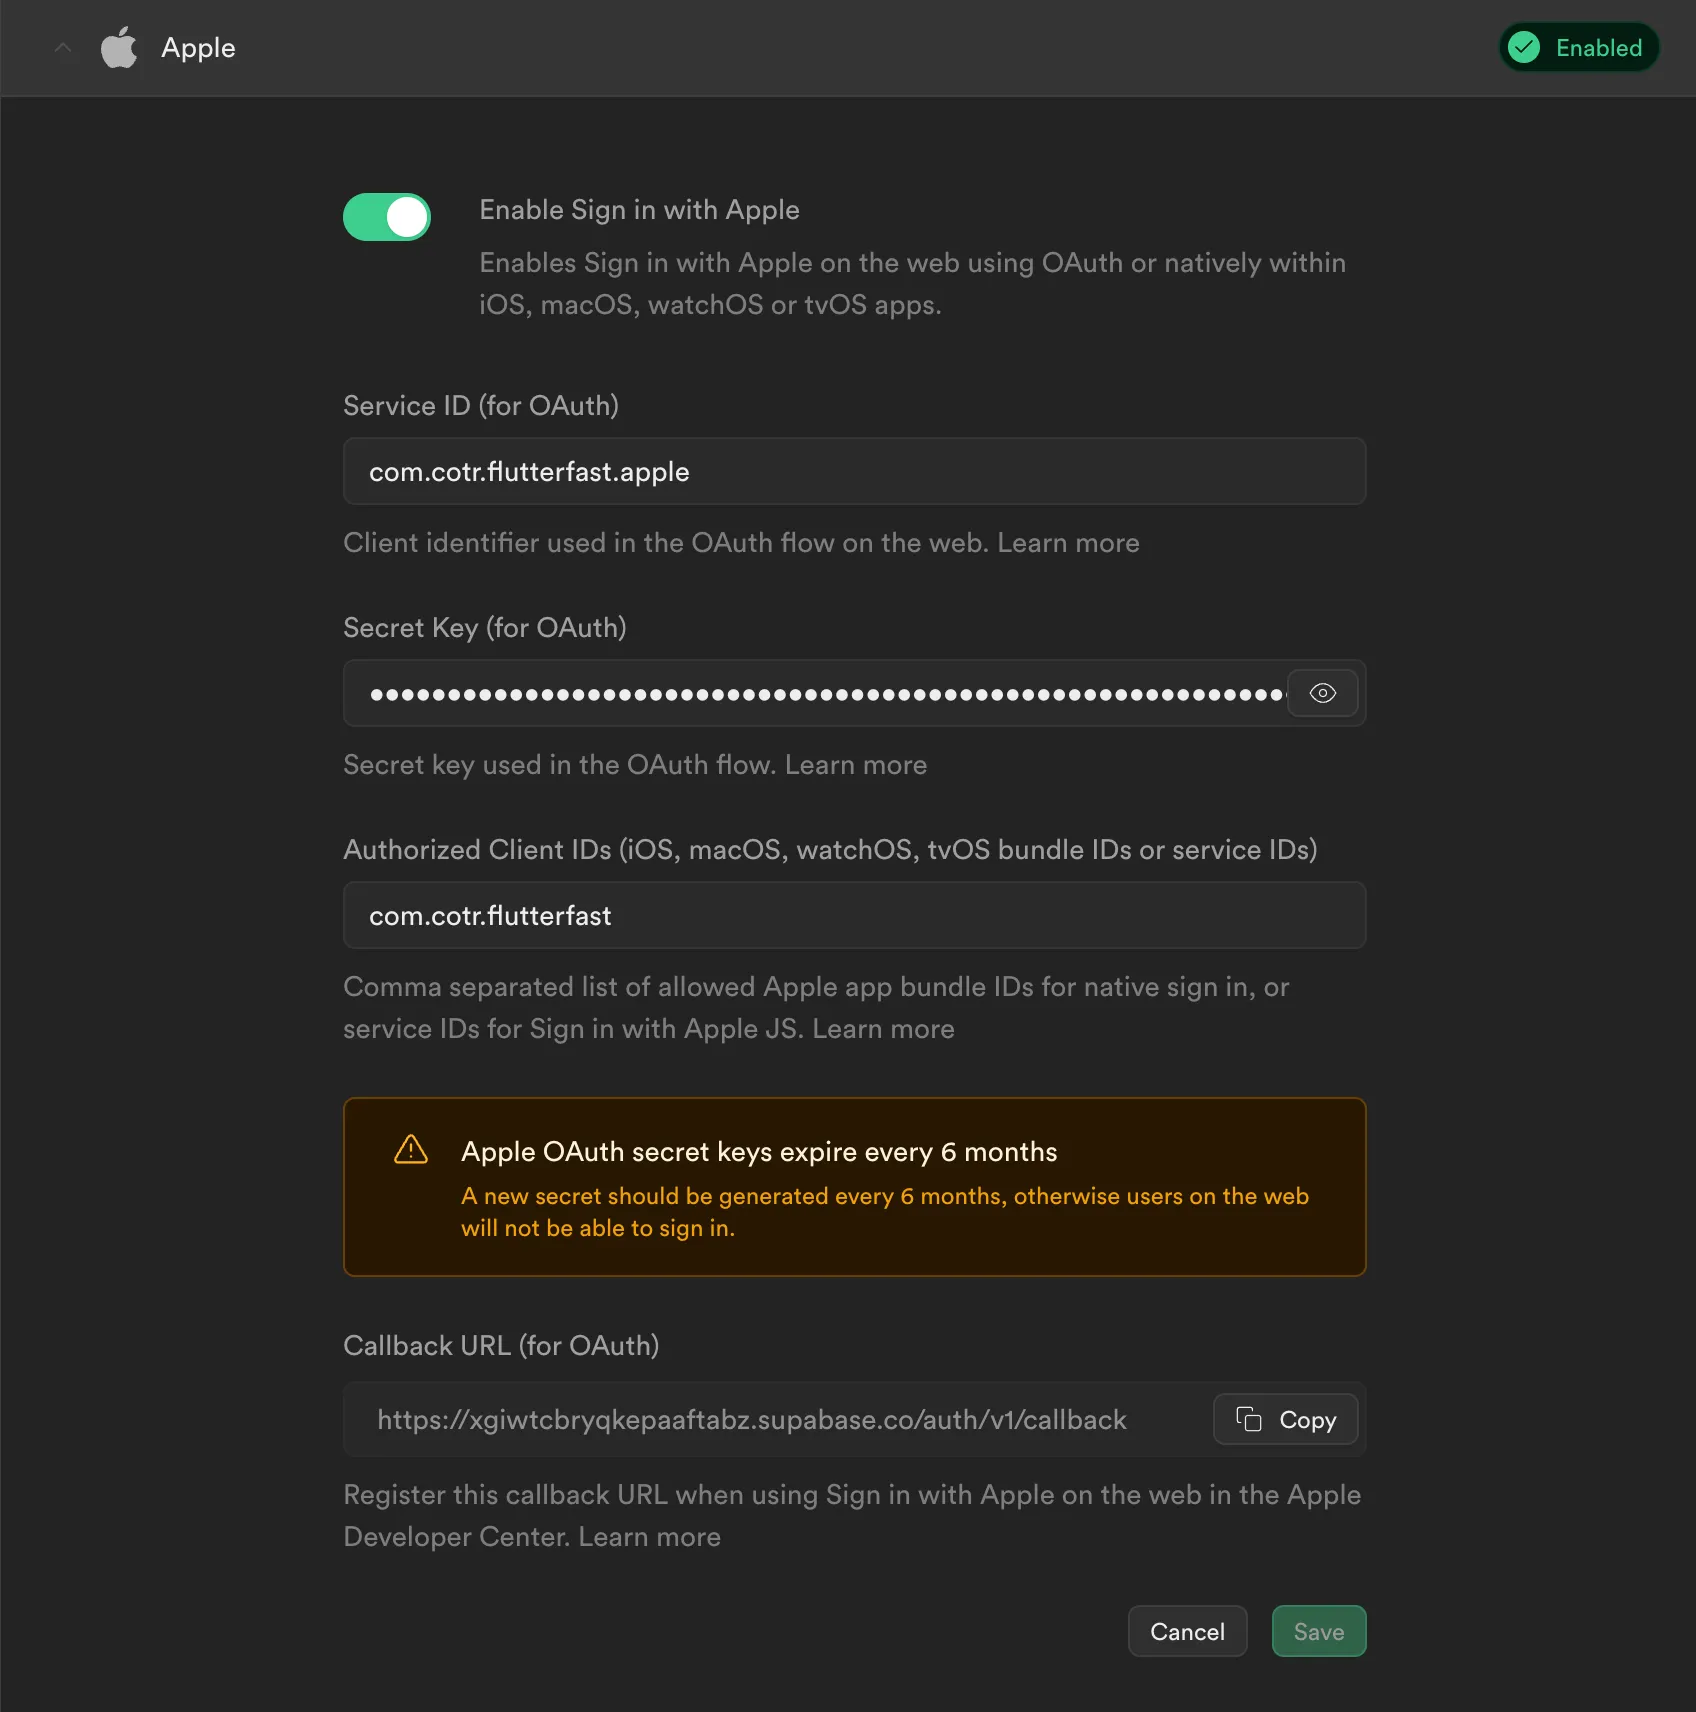
Copy the callback URL from the Supabase console and add it to the “Return URLs” under Identifiers > Your Apple Sign In identifier > Configure in the Apple Developer Console.

When a user signs in with Apple, a browser window will open to authenticate the user. When they have successfully authenticated, the browser will redirect to the URL you specify in the redirectTo field in your app:
supabase.auth.signInWithOAuth( OAuthProvider.apple, redirectTo: 'my-scheme://login-callback',);For this to work, you need to setup deep links. The Flutter Fast template includes a deep link configuration that looks like this:
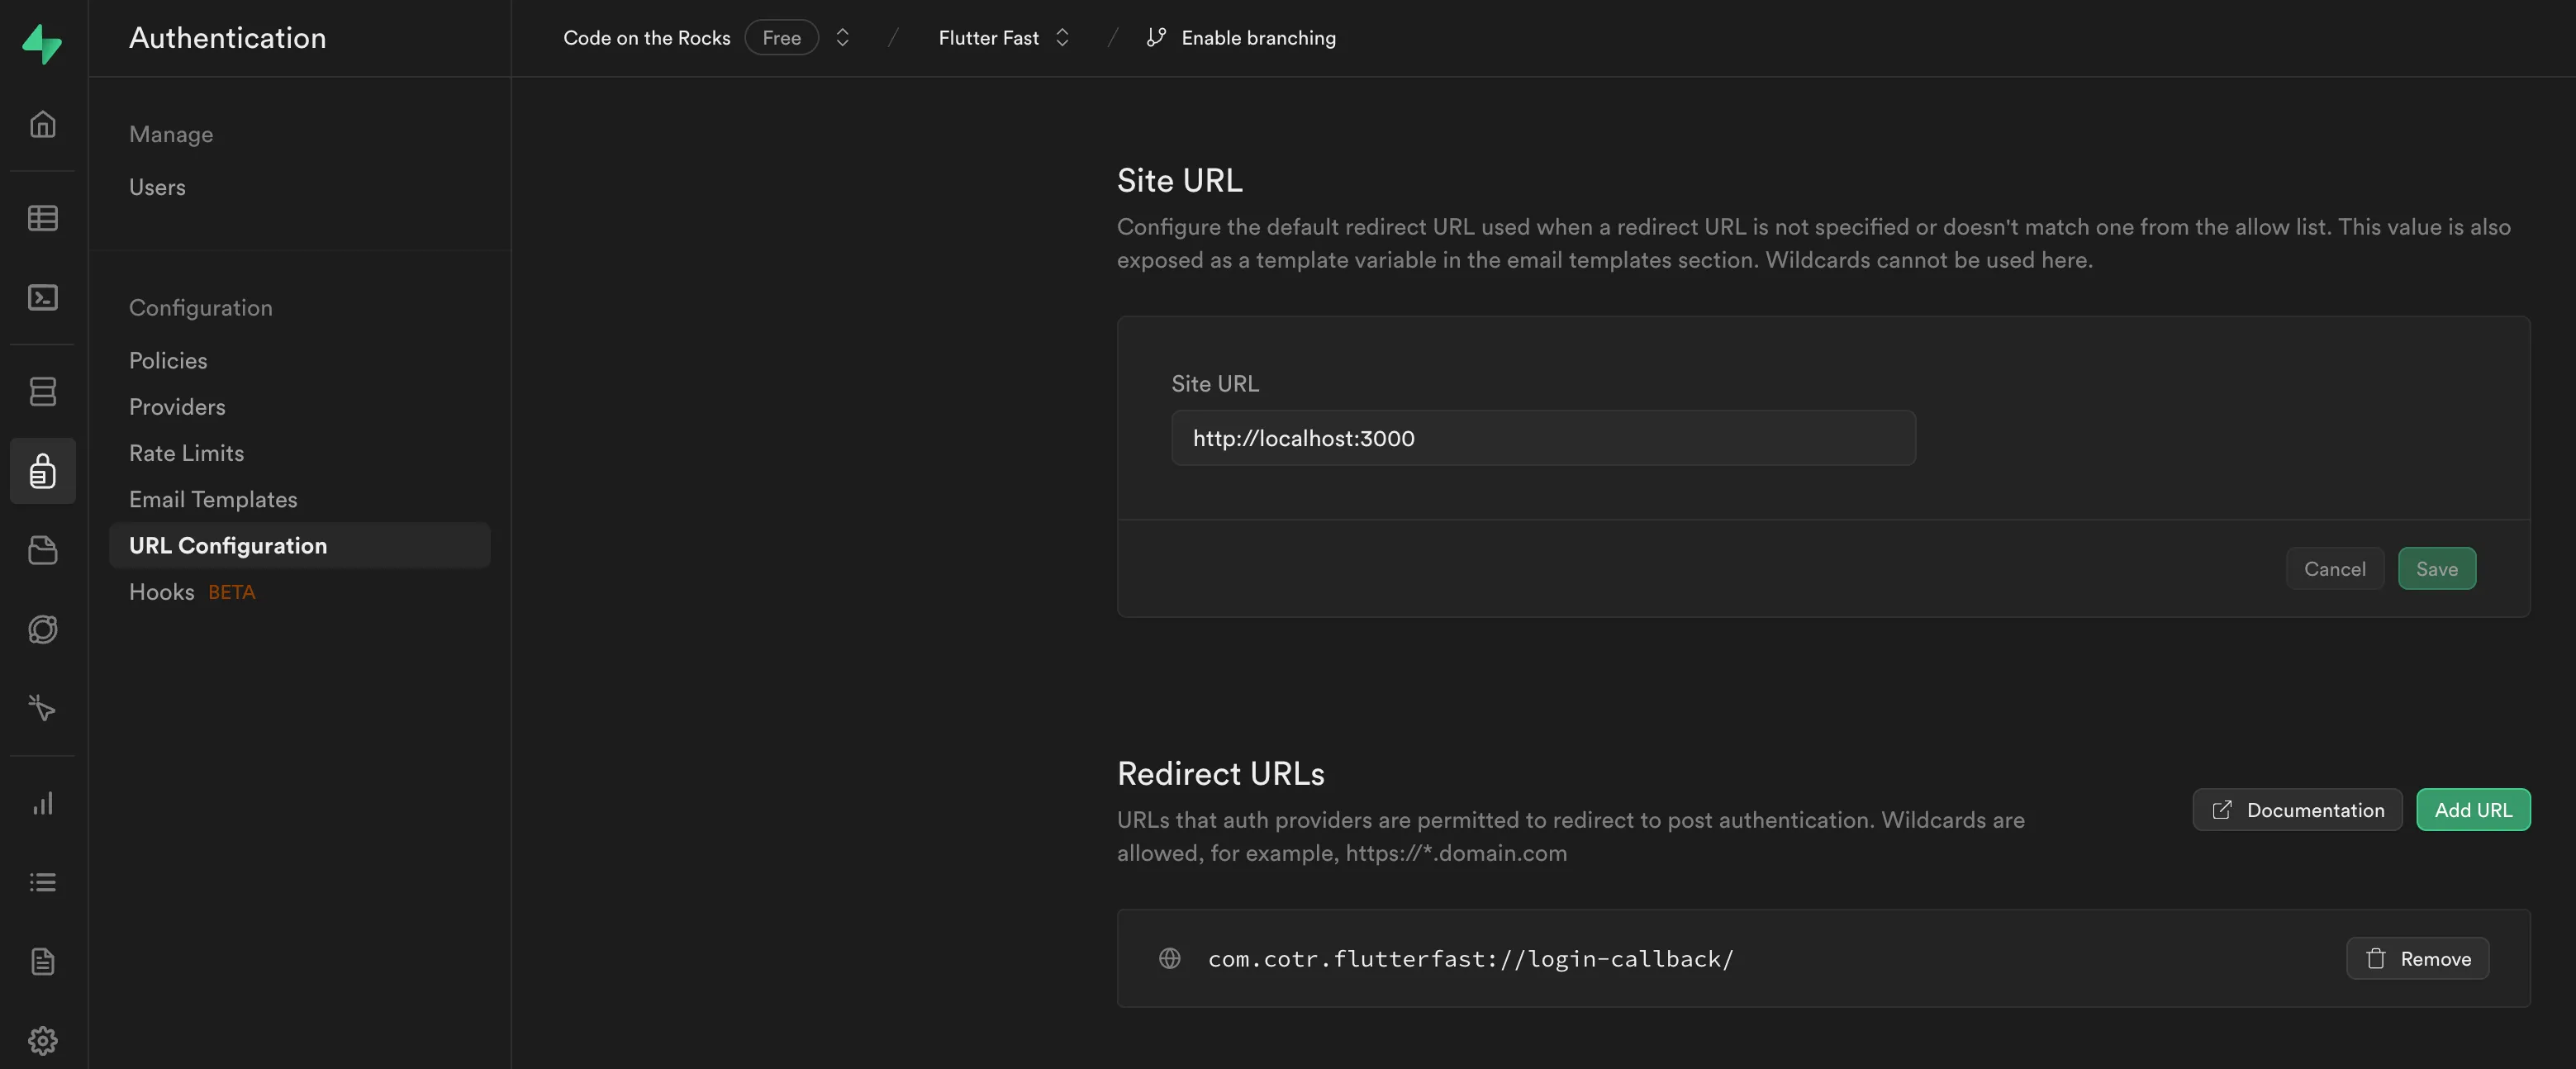
<intent-filter android:label="OAuth"> <action android:name="android.intent.action.VIEW" /> <category android:name="android.intent.category.DEFAULT" /> <category android:name="android.intent.category.BROWSABLE" /> <!-- Accepts URIs that begin with "com.cotr.flutterfast://login-callback --> <data android:scheme="com.cotr.flutterfast" android:host="login-callback" /></intent-filter>In your Supabase console, under Authentication > URL Configuration, add the redirect URL (ex. com.cotr.flutterfast://login-callback)
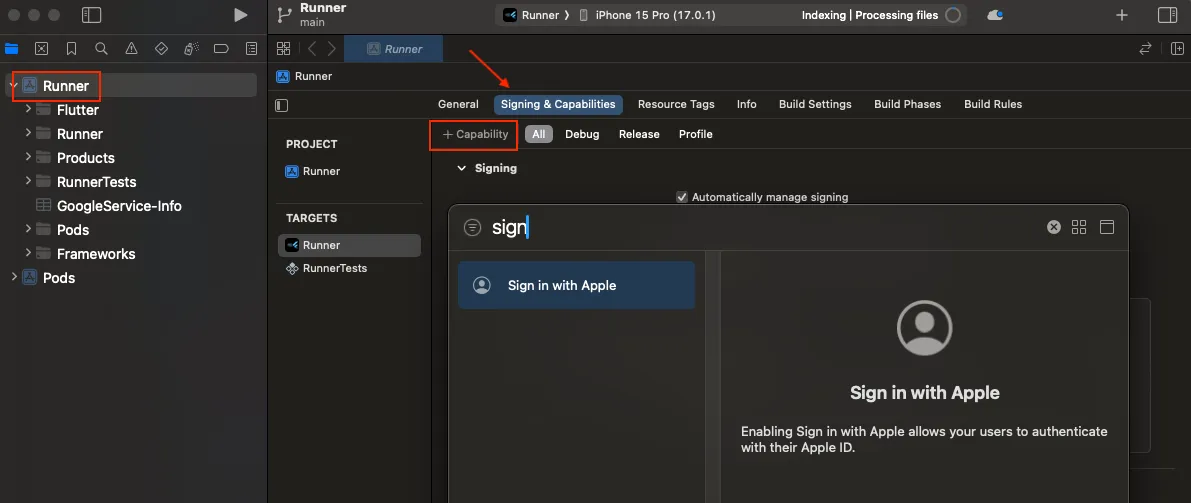
Open your project in Xcode and add the “Sign in with Apple” capability.
In the Supabase console, navigate to Authentication > URL Configuration > Site URL. When developing, you can specify the web port using the --web-port=5000 argument. For the OAuth redirect to work in development, you need to be running the app on the port specified in your Supabase console.